IMPORTANT NOTE: Do not attempt to use Google Drive as your database location. Please see the following information:
If you punch in an employee on one computer, it does not show on another computer as it should as you are not actually working in a shared database. The local copy of the database will sync with the one on Google Drive after a minute or so. That is why the status does not show, the different computers all have their own local copy of the database you are not actually working from the same database.
So now if you go to the other computer and punch in another employee, that local database will sync and replace the first synced copy replacing any punches made on the first computer.
So the bottom line is Google Drive is not a reliable solution for storage of your "shared" database.
Before creating a new Company Database, see our notes on Invalid File Name.
Click here to see the notes.
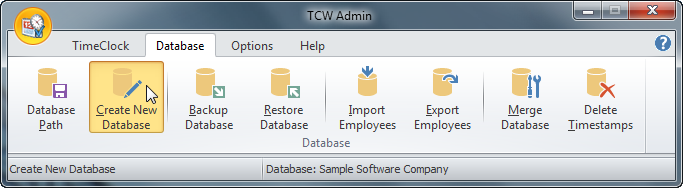
Step 1 - To create a company file, on the main page under the "Database" Tab click on the "Create New Database" button.
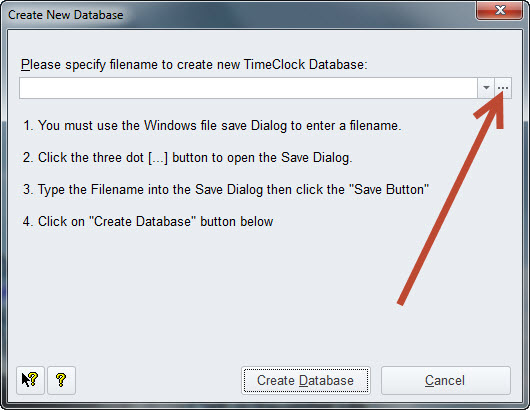
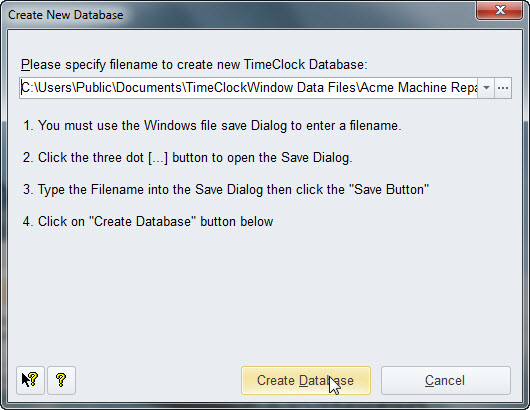
Step 2 - That will open the following page. See the step by step instructions on that Dialog which as shown below as well. Do not enter anything in the prompt, but instead, click on that small square button just under the mouse pointer.
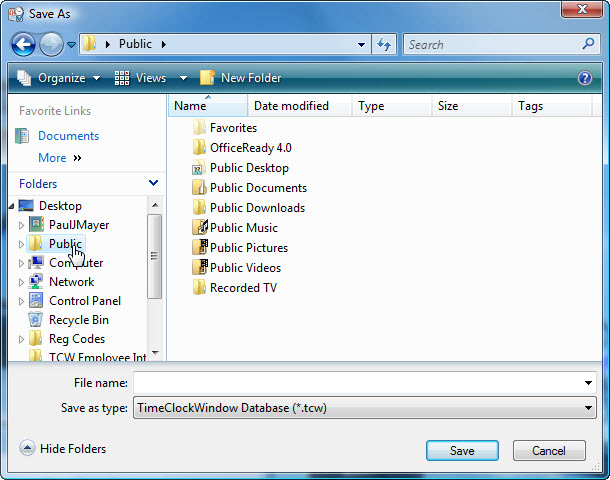
Step 3 -That will open the Windows File Open Dialog. If you are on a single computer that is not on a network, you can simply select the Documents in place of the Public folder
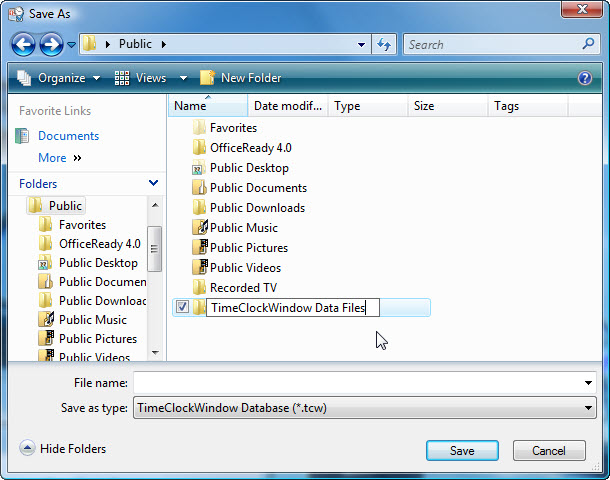
We will explain here how to create a database that will be shared over your network so it can be accessed from all of the computers on the network. Locate the Public folder for your computer and open it so you can create a new folder in the right side of the Window.
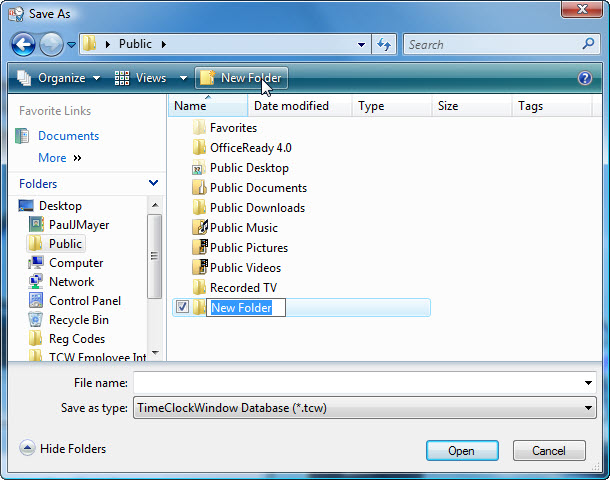
Step 4 - Then click to create a New Folder and you will see something similar to this:
Step 5 - You will edit the "New Folder" text holder to be called "TimeClockWindow Data Files" like you see below:
Step 6 - Pressing the "Enter" key will save that new folder name. Then double click on the Icon for the new folder to open it up and you will see something like this:
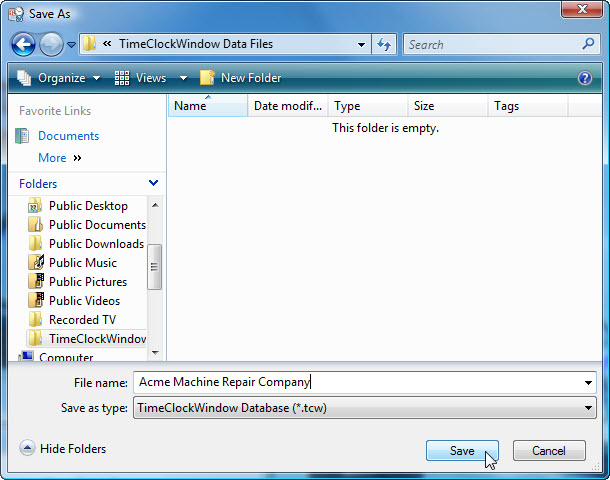
Step 7 - Then type in the company name that you want to use as we did in our example above. Then click the Save button to create the new filename.
That will return you to the starting point and clicking the "Create Database" button will create the new company database.
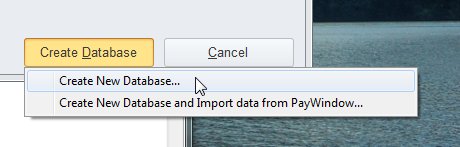
Step 8 - If you are not a PayWindow Payroll software user, click on "Create New Database" to create it and immediately enter into entering your Company information. If you are a PayWindow user, click on Create New Database and Import data from PayWindow to import the Company Information, Departments and Employees.